Summary
This article describes how to upload a test monitoring file to the Jornaya platform to verify formatting requirements are met and/or that a Data Source Integration is working as expected.
Uploading a Test Monitoring File
Testing a monitoring file upload can be performed on any Activate Instance but using an instance that is separate from a live, production instance is preferred.
Using a separate instance for testing avoids comingling data from the test monitoring file and the production data. This also prevents test data from displaying in Jornaya reporting
To Upload a Test Monitoring File
- If using a separate instance for testing, add a prefix of "Test_" to the Instance name within myJornaya
- Follow the instructions for your desired connection method under Connect a Data Source
- Leave the Activate Instance Configuration set to "On-Demand"
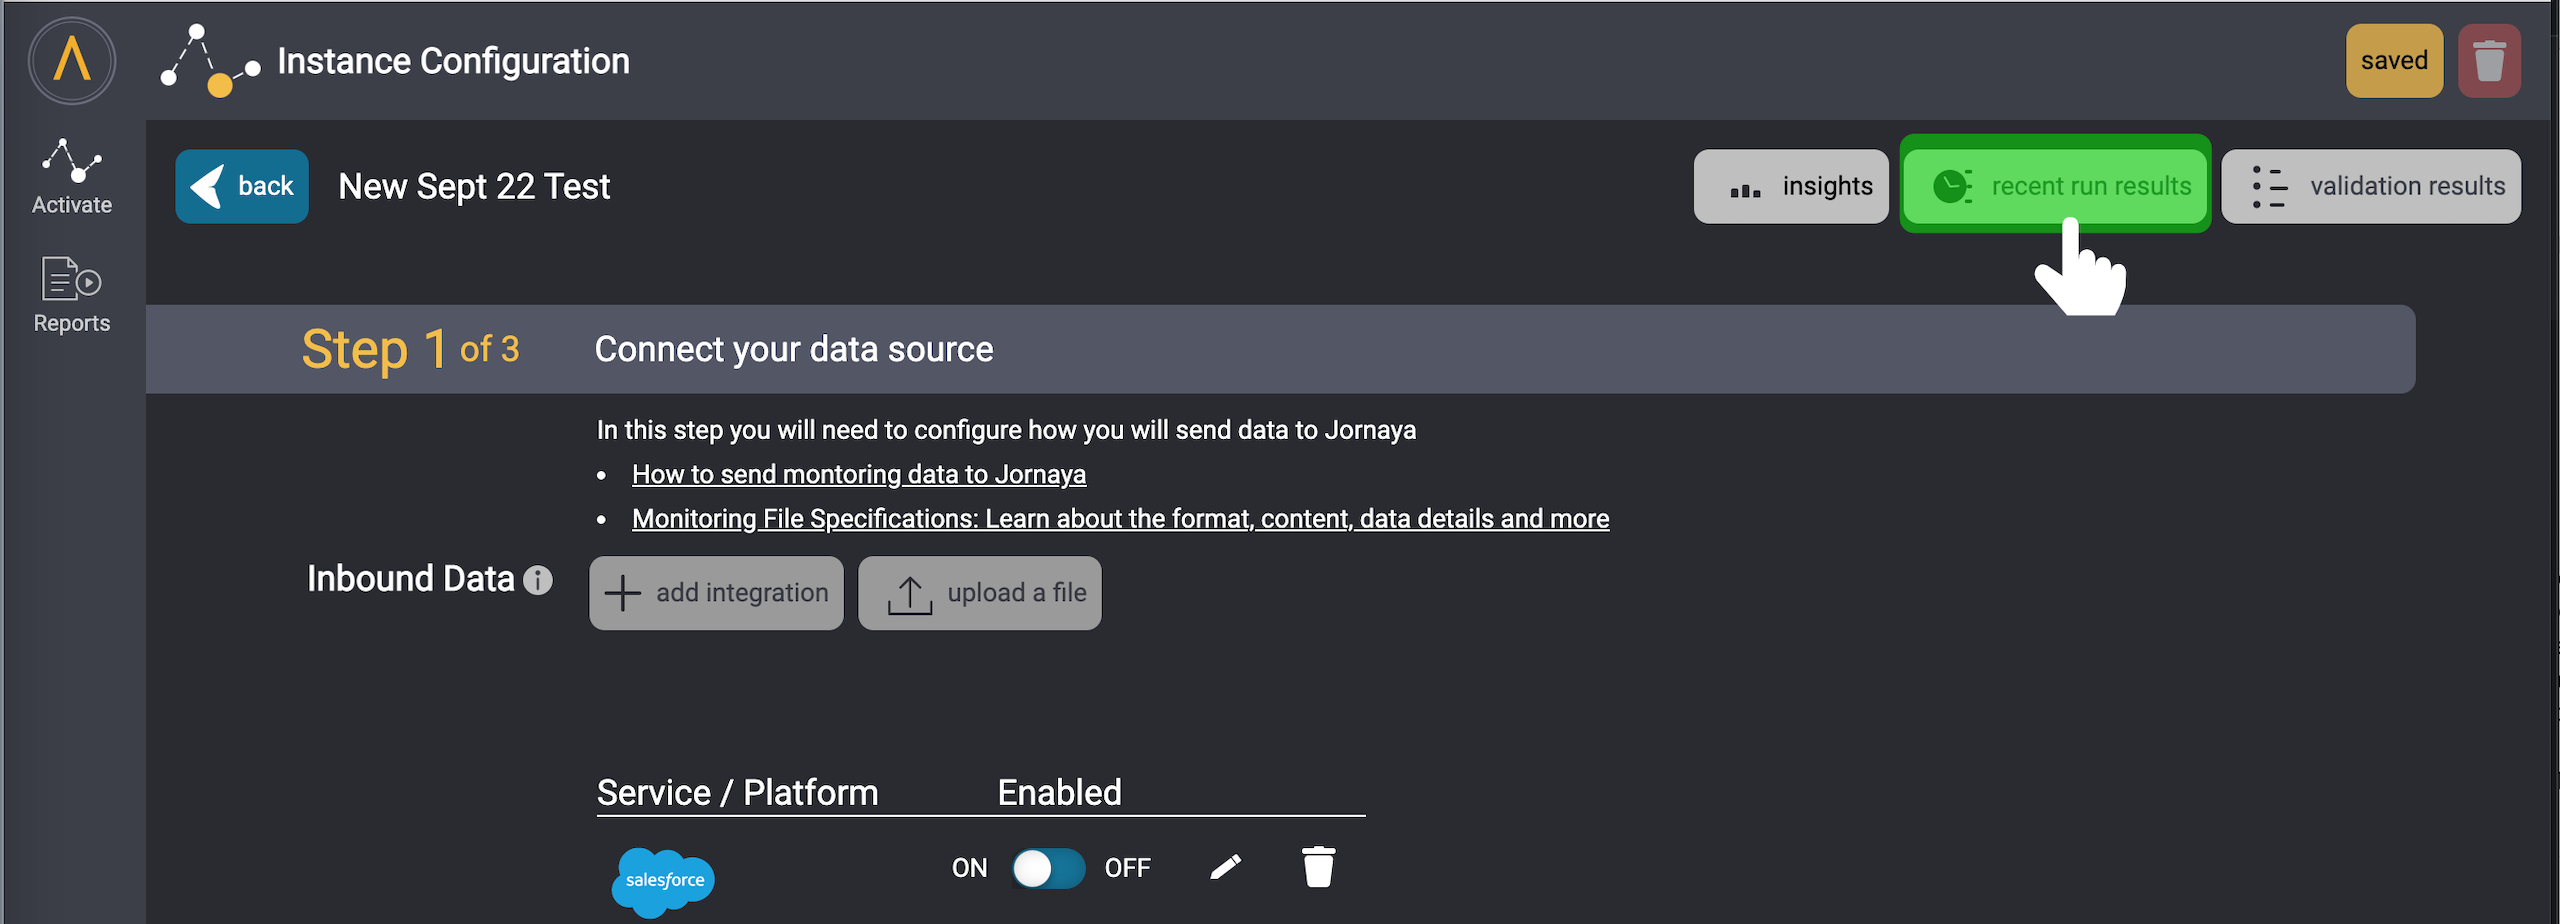
- If using a Data Source Integration, toggle the integration OFF (toggle slider to the right) and then back ON (toggle slider to the left/blue). This will trigger Activate to attempt to retrieve a monitoring file via the integration.
Integration Off

Integration On

Once a file is connected, Activate will verify that the file meets Jornaya's specification requirements. Jornaya will reach out if the file upload is not successful. Please reach out to VMSCustomerSuccess@verisk.com for confirmation or other integration questions.
If the monitoring file upload is successful, the Activate Platform will run for that monitoring file ONCE while the instance is set to "On-Demand". The results of this run can be retrieved and downloaded from the "recent run results" button in the upper right of the instance screen.
Results are typically available 1-2 hours after a monitoring file is uploaded

What's Next?
Now that you have your Data Source connected, it is time to ensure that you are set up to Receive Jornaya Activate Signals!