Summary
Once the JavaScript has been implemented, it's time to test. Using the campaign implementation self-test ensures that the campaign JavaScript is properly implemented on a website or within a call center.
Step 1: Confirm that you have implemented the correct Campaign Script
When implementing the campaign script on a consumer-facing website, the campaign type should be set to "Web Campaign".
When implementing the script within a call center (regardless of whether the call center agent inputs data into a website), the campaign type should be set to "Call Center".
To check which campaign type you have implemented:
Find the campaign key associated with the website you are testing.
A. In the browser Developer tools Console tab type the case-sensitive command: LeadiD.getLck()Copy and paste the campaign key to a separate text document for later use
In the Member Portal, click on the "Campaign" tab and select "My Campaigns"
Search for the campaign key, and select "Edit" on the right side of the screen
The page will indicate the campaign type associated with this campaign key
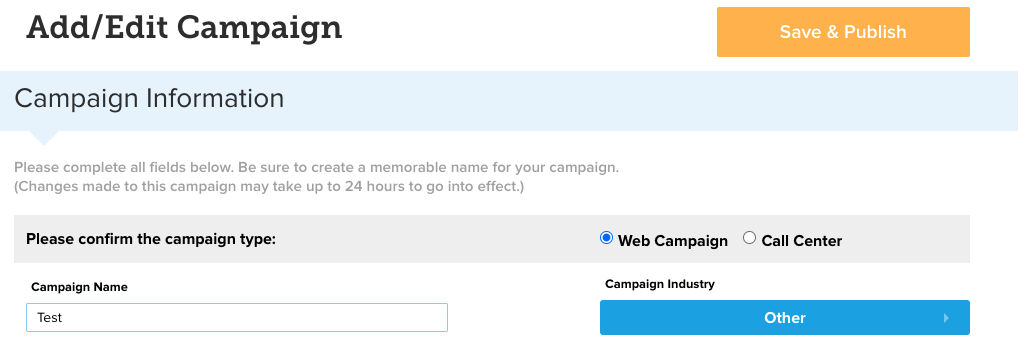
If the correct campaign type is selected, continue to Step 2.
If the Wrong Campaign Type is Chosen
Select the correct campaign type in the Member Portal, then click Save & Publish
Follow the instructions in the Getting Started Guide to update the code on your site. The code is different for Call Center & Web leads
Once complete continue to Step 2 in the self-test below
Step 2: Generate a LeadiD token via your website & locate it in the Member Portal
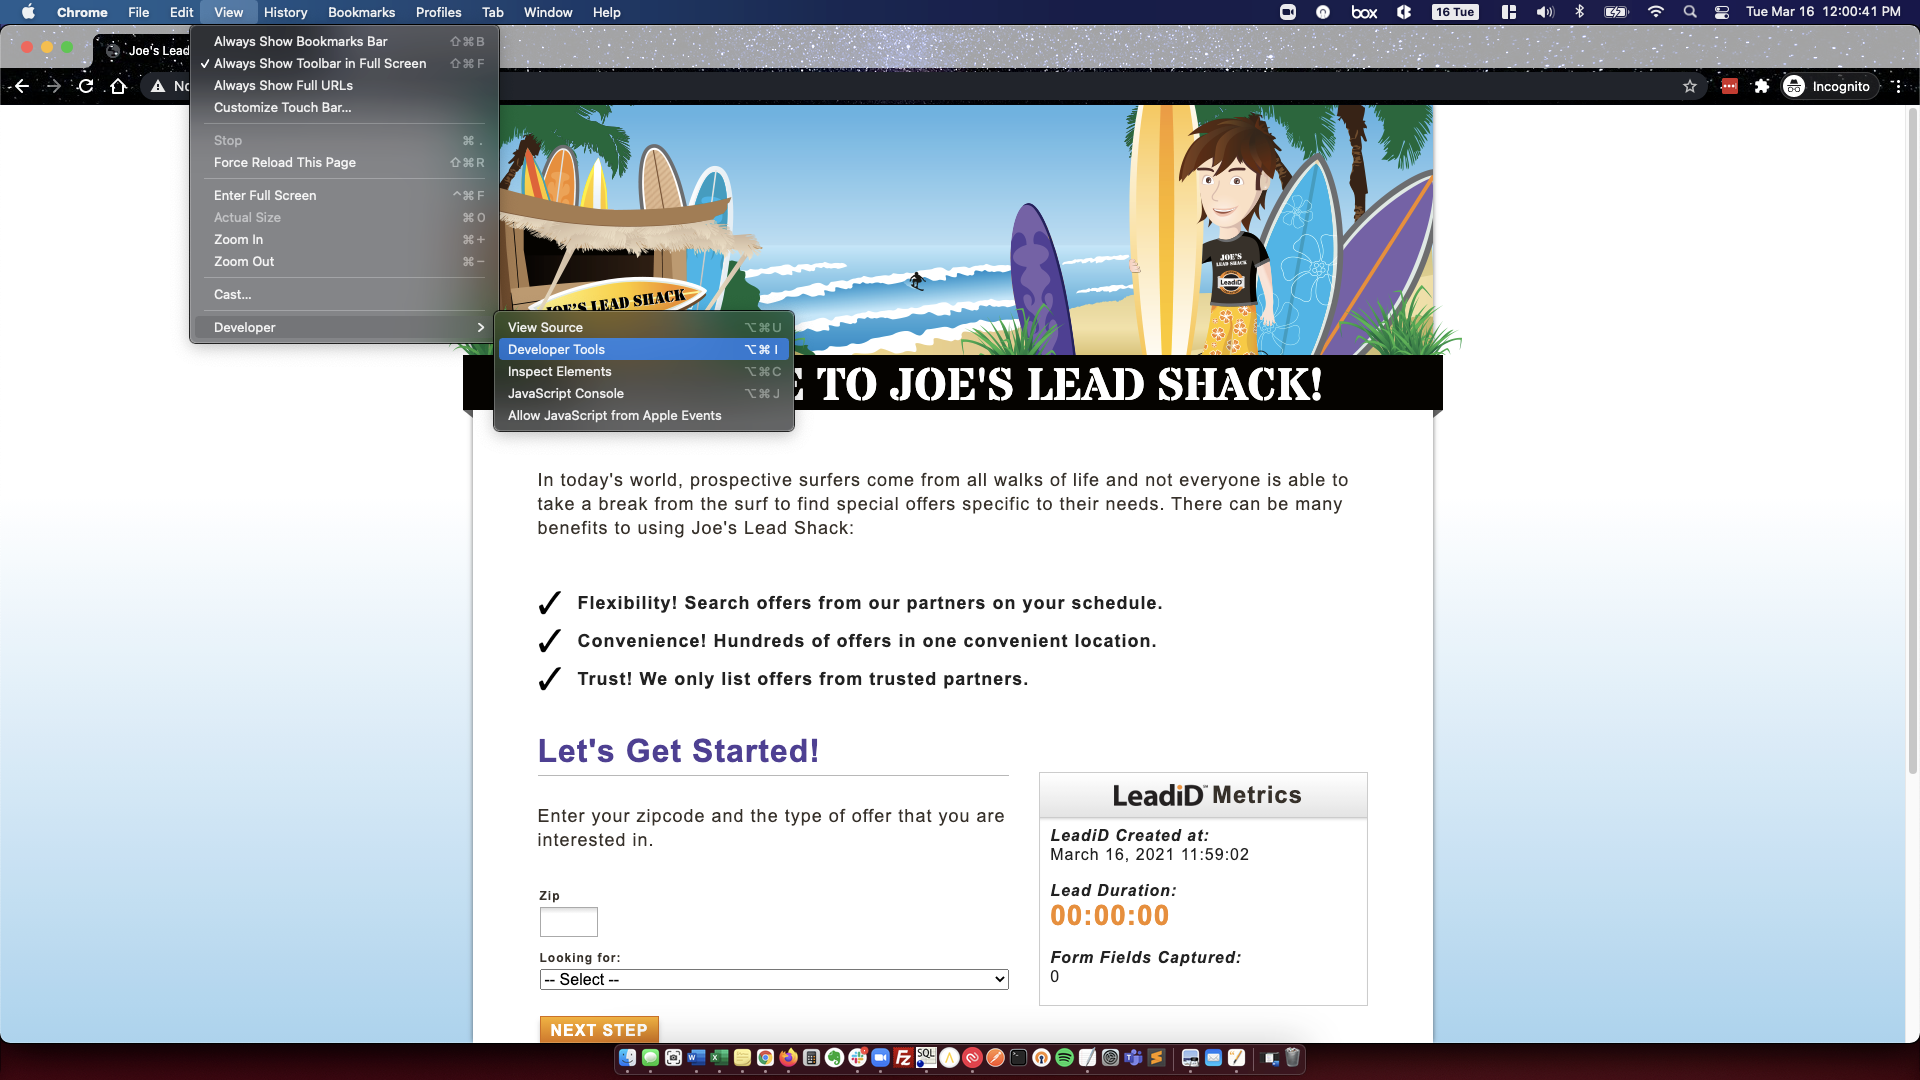
Open your browser and go to the URL where the campaign script is implemented; then open the developer tools
Chrome: View-->Developer-->Developer Tools
Firefox: Tools-->Web Developer—>Inspector
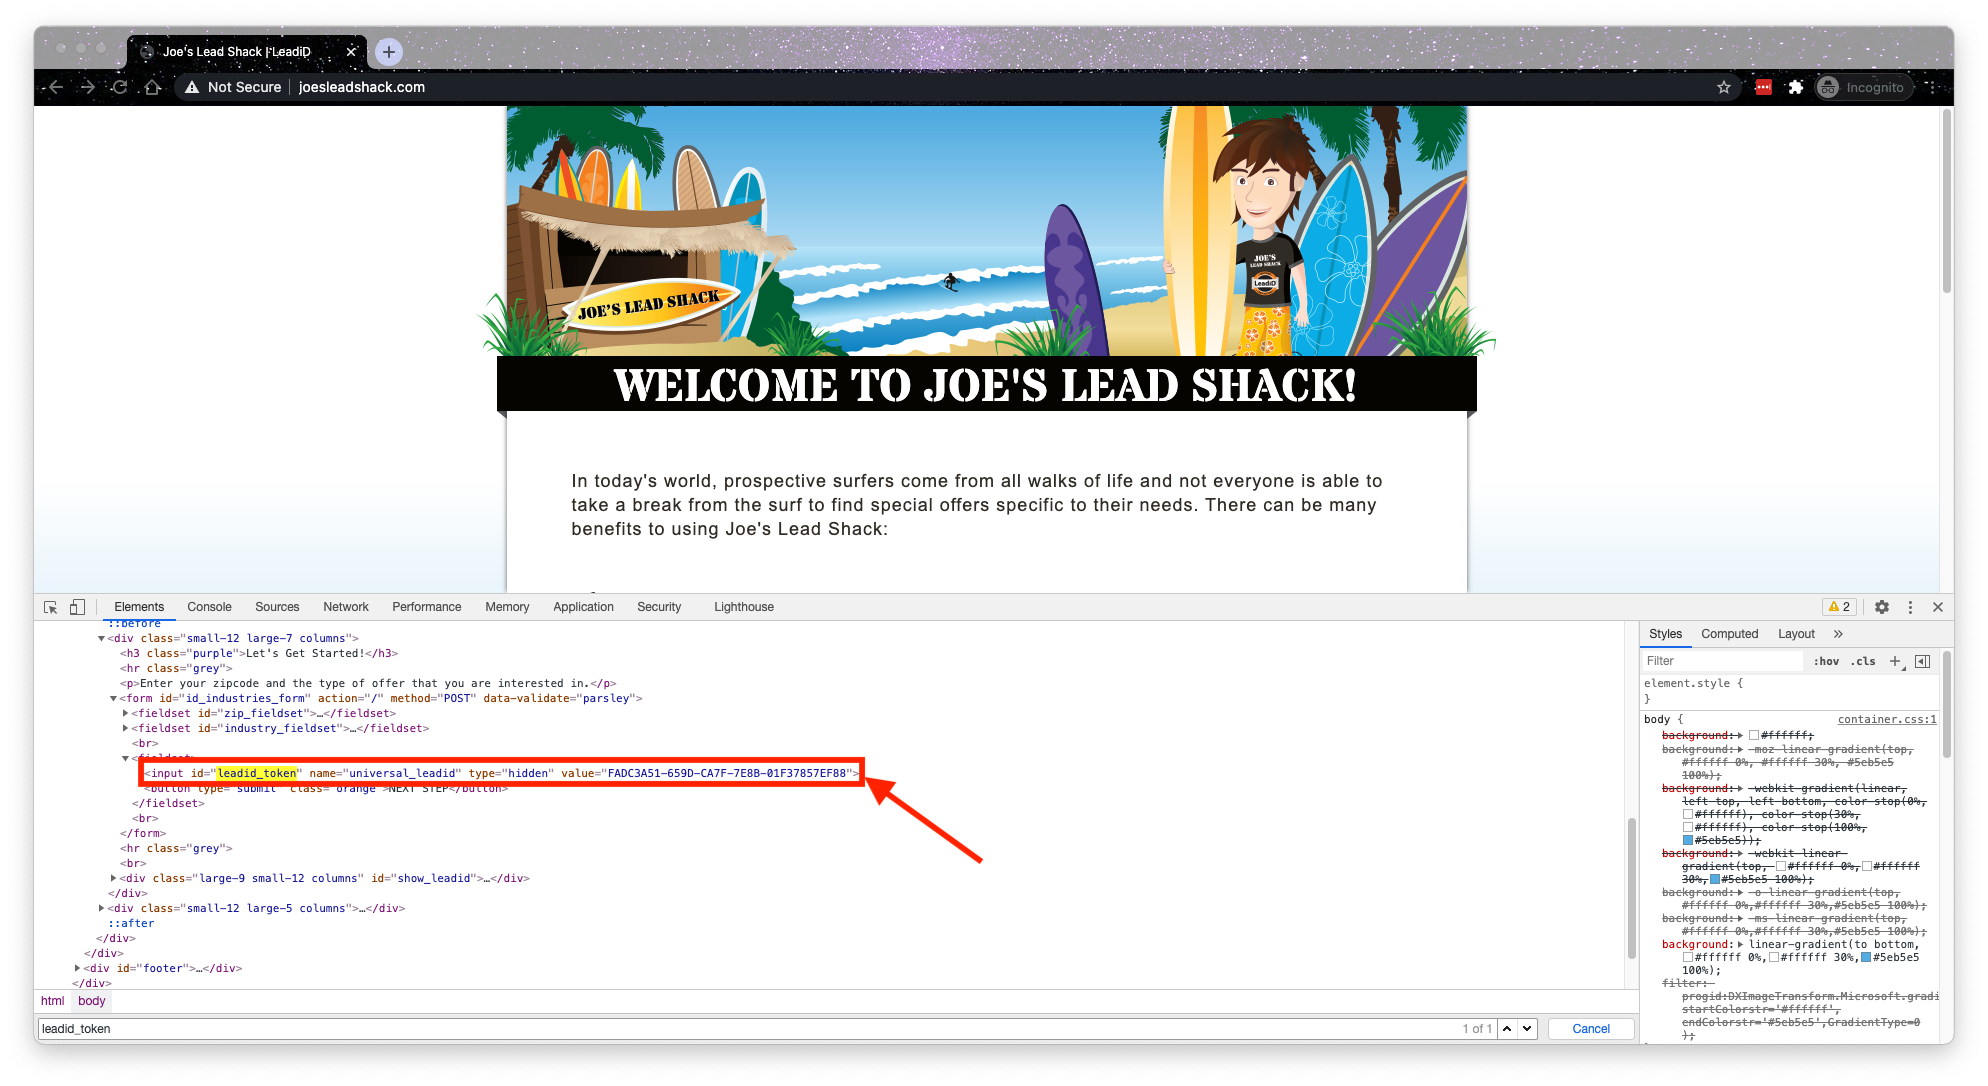
Find the LeadiD token in the Elements tab by searching for the string “leadid_token”. Copy and paste the LeadiD token value to a separate text document (to be used later in Step 4)
**Example hidden input code: **
<input id="leadid_token" name="universal_leadid" type="hidden" value="LEADID TOKEN VALUE">
Value Doesn’t Populate or You Can’t Find the Hidden Input
If a value doesn’t populate or you are unable to find the hidden input you must stop here and check the following items:
Is the hidden input ID on the site equal to “leadid_token”? It does not need to be as long as the Callback function instructions are also followed.
Is the script or hidden input inside of an iframe? If so, refer to our iframe instructions.
Verify that only one (1) campaign JavaScript is on the page.
If multiple JavaScripts are on the page, the following message will appear in the developer tools console of the browser:
"A duplicate LeadiD script has been detected on the page! This can cause errors and should be avoided"
Fix: If this error appears, remove the additional script and confirm this error no longer appears when opening a new browser window.
Ensure unique LeadiD tokens are being generated for new lead sessions
Close the browser tab, immediately open a browser in Incognito mode, and navigate to the URL with the campaign javascript implemented.
In the developer tool console tab, type the command LeadiD.token (case sensitive) to see the LeadiD token generated
Ensure the new token is unique from the original token you documented in Step 2. Copy and paste the new token into the text document for use later (you may discard the first token generated)
In a new tab, navigate to the Member Portal and log in.
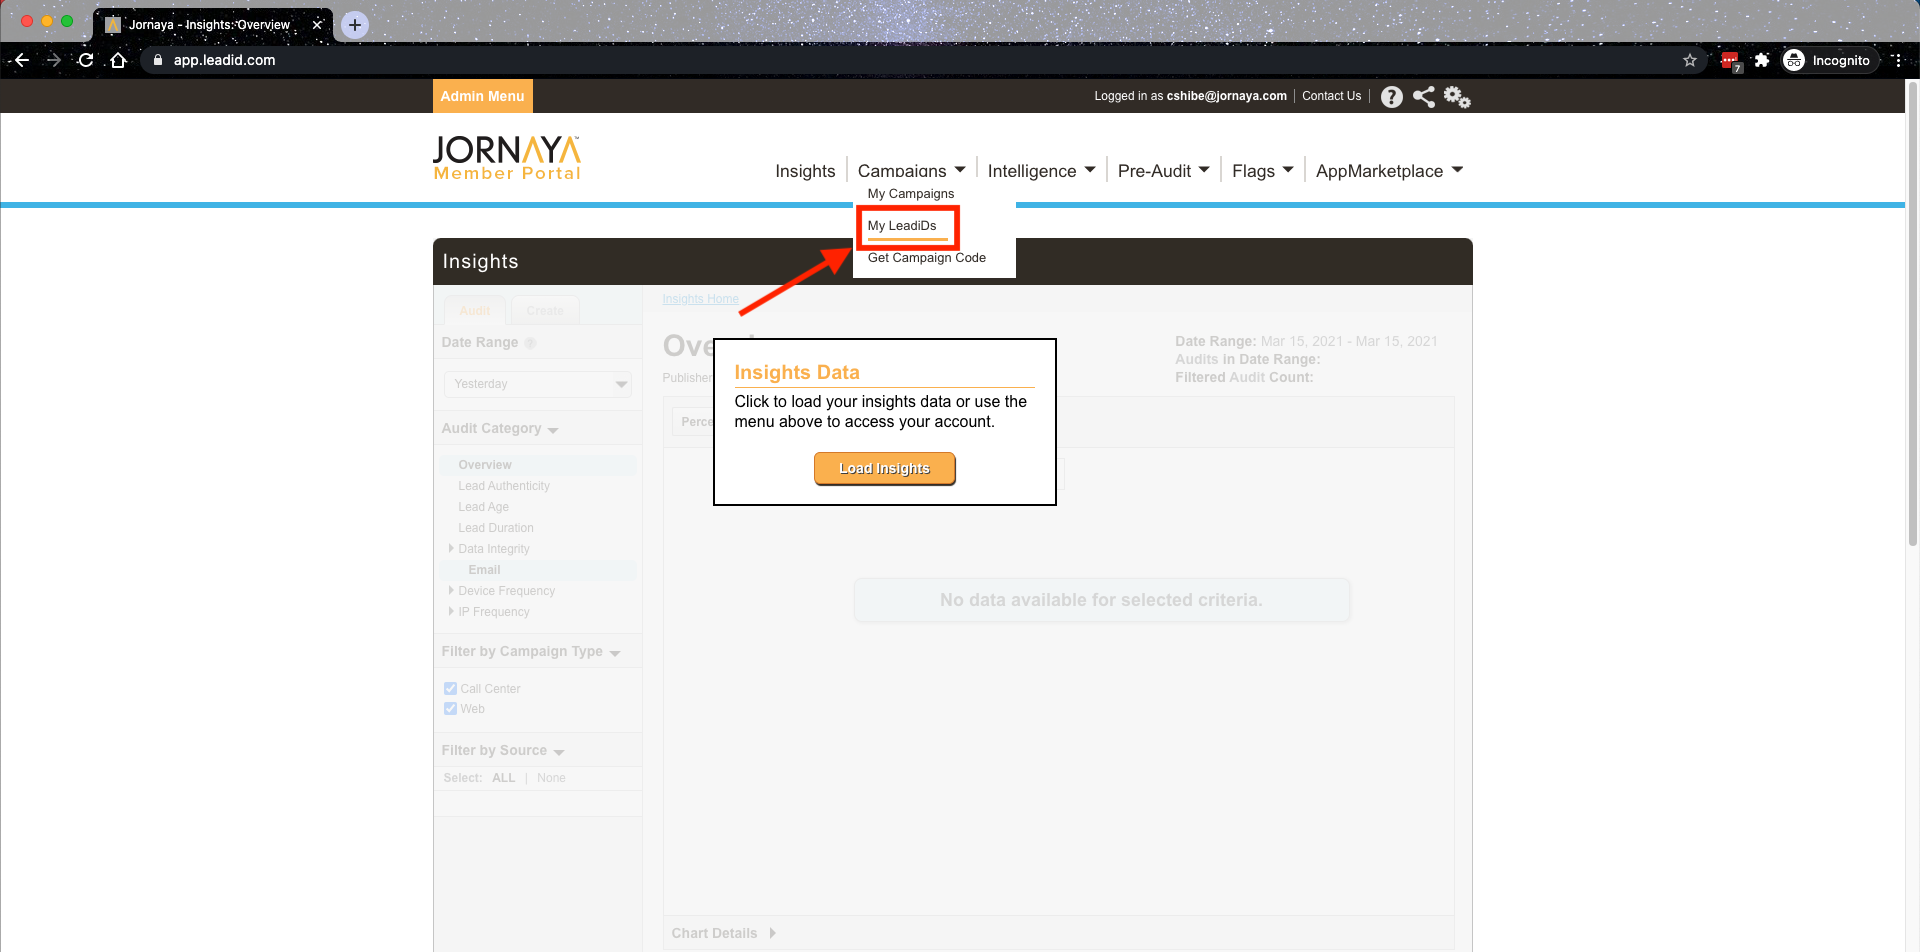
Navigate to Campaigns > My LeadiDs
Using the search bar, paste the LeadiD token value that you copied from Step 4 above and click "Search".

Step 3: Use the Member Portal to verify interactions are being captured
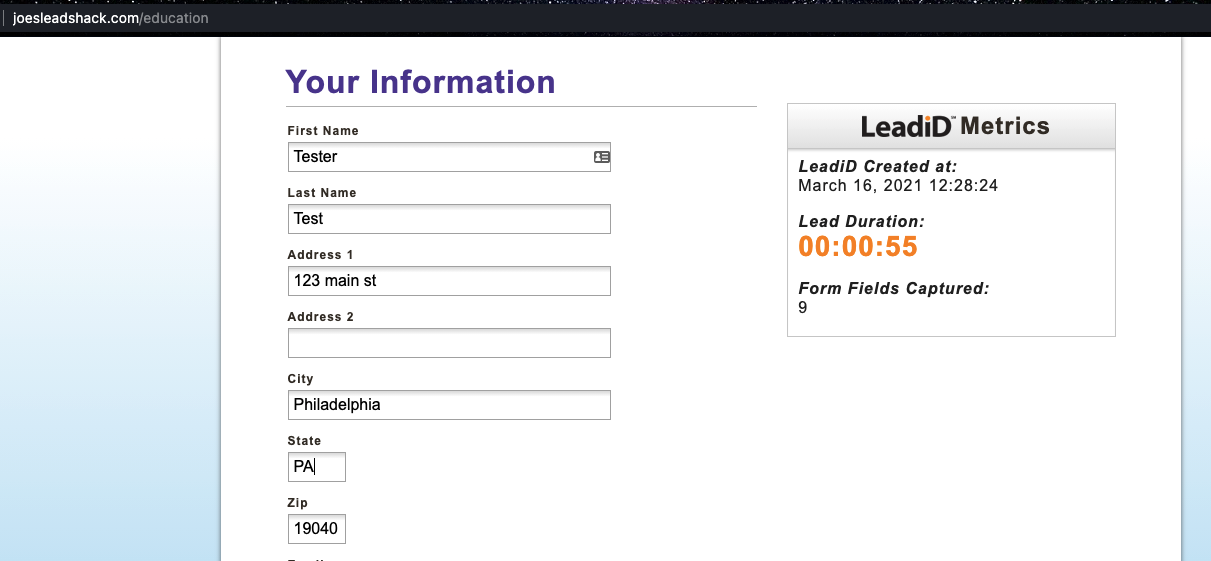
Now that you have both the website and the lead details in different tabs, it is time to begin completing a test web form to verify that all appropriate interactions are being captured. To do this we'll use the Member Portal. Be sure to refresh the page in the Member Portal after each form interaction so it reflects the most recent actions that have taken place.
Each completed text field on the inquiry form represents a consumer or call center agent interaction.
Portal interactions observed: Each form field interaction that was captured is represented by a blue and/or white row in the Consumer Actions section for a given lead in the Member Portal. The orange rows indicate init form fields that have been captured and do not indicate that an interaction has occurred.
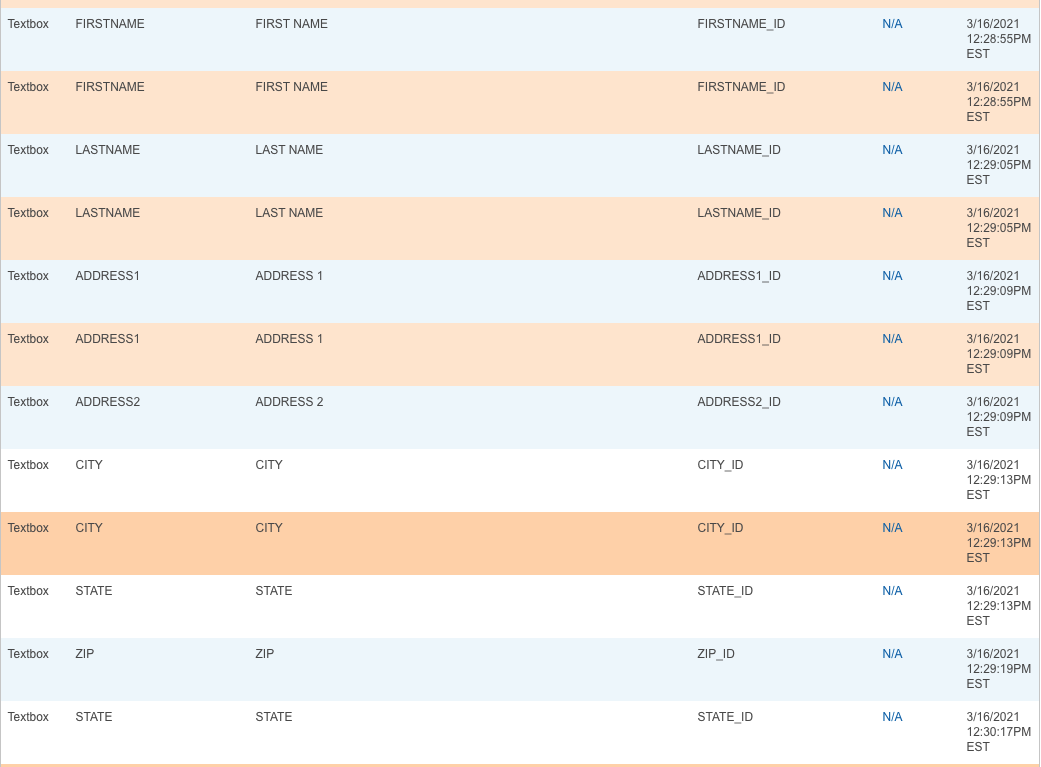
If you do not observe portal interactions for every field input on your website, stop and check for the following:
The script is on every page of the funnel
The script is not in the head element of the page
The script is not isolated in an iframe
Step 4: Confirm the campaign javascript is on the page after the consumer or call center agent accepts/submits their consent to the privacy disclosure
On the page AFTER the consumer or call center agent accepts/submits their consent to the privacy disclosure,
In the developer tools console tab, use the command "LeadiD.token"
Confirm the token returned is the same as in Step 2 and substep 4.
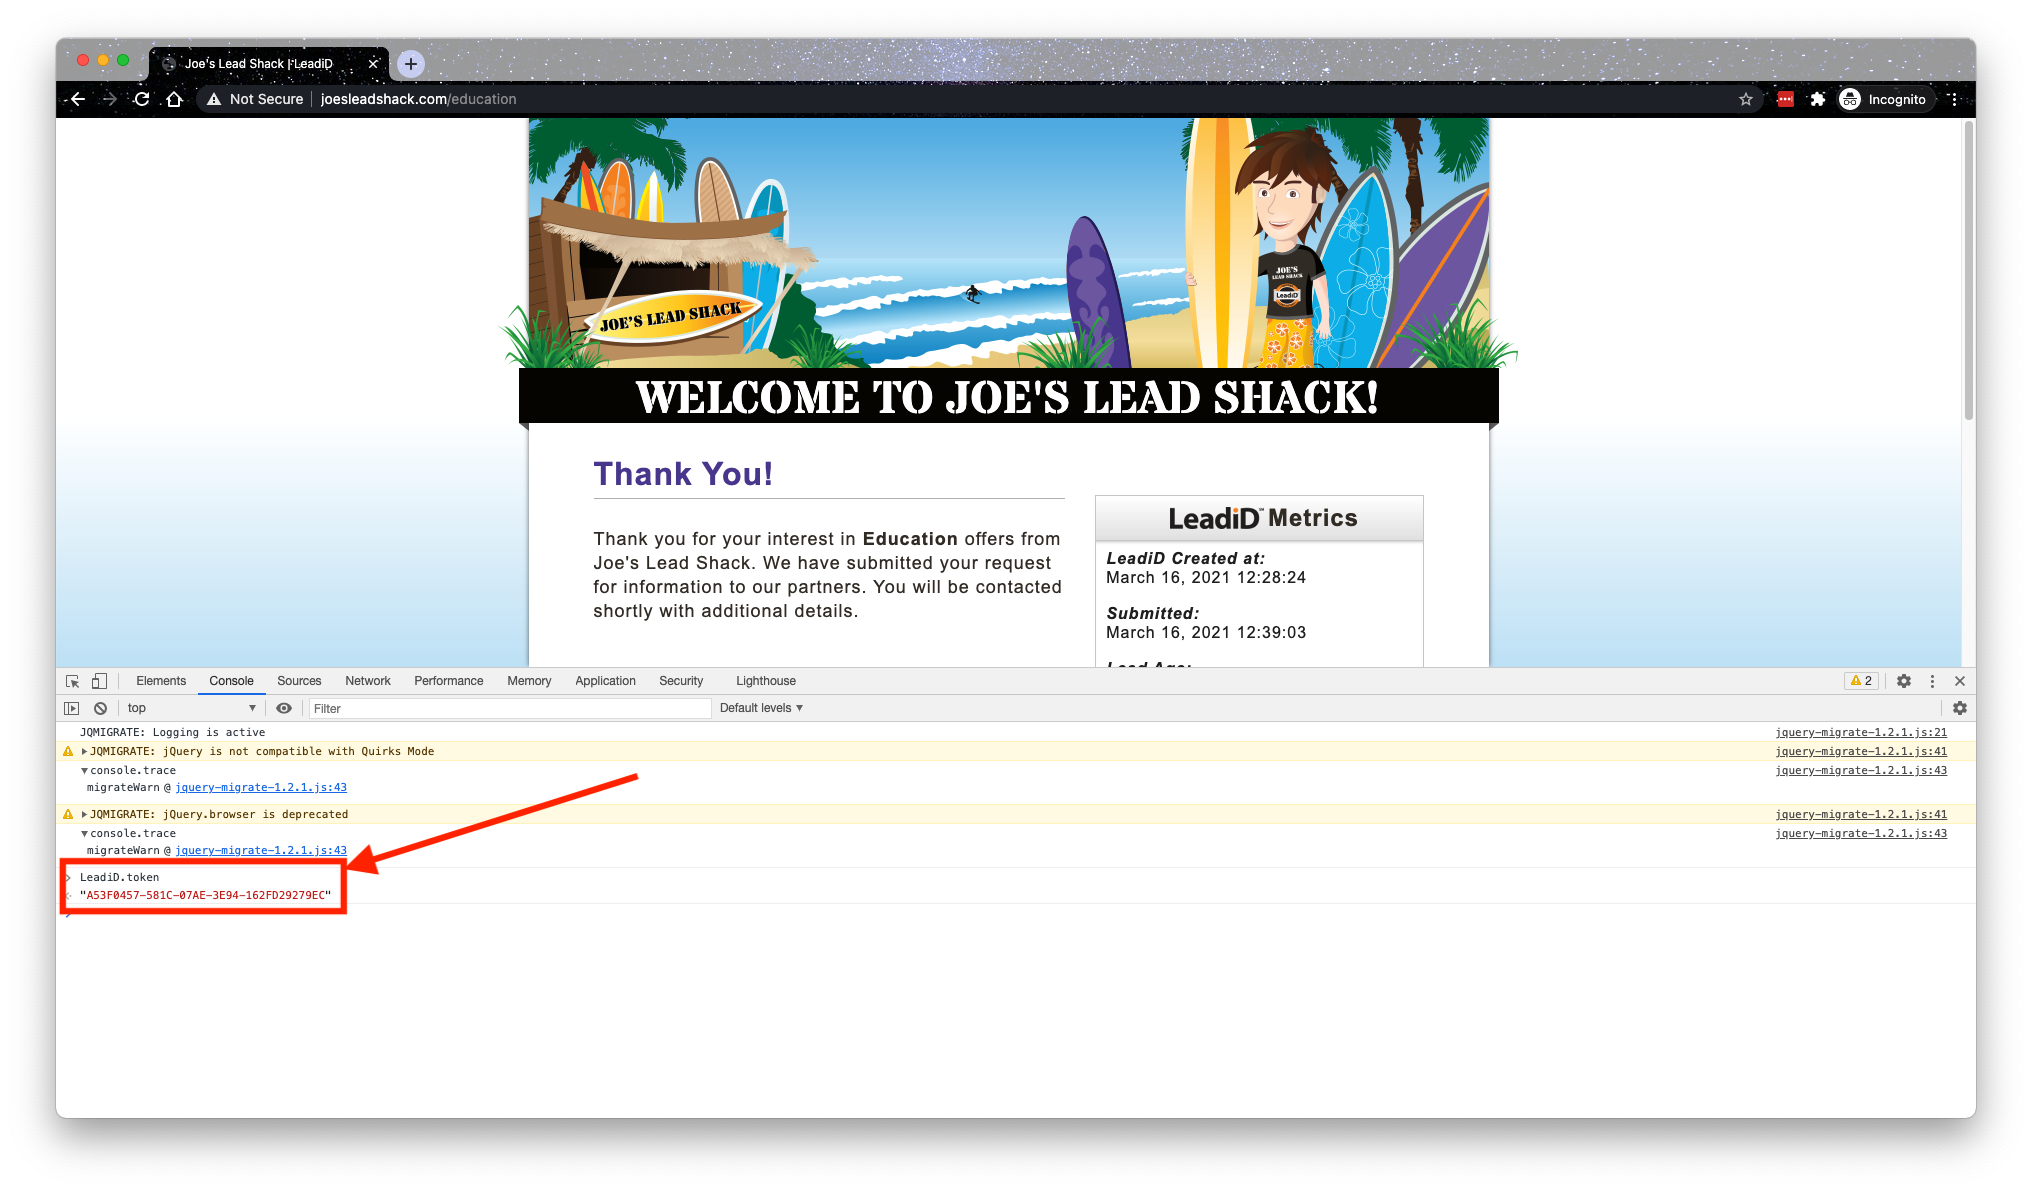
Take a screenshot of the LeadiD token firing on the form Thank you/confirmation page.
Save the screenshot for submission in the Confirmation survey in Step 7.
Below is an example using Chrome Developer Tools (Open Dev Tools >Select Console > Enter “LeadiD.token” to reveal the LeadiD token value).
Step 5: Review your TCPA Disclosure Implementation
In the Member Portal, as soon as the Lead Detail result is displayed, you will see if the disclosures were captured and if the TCPA labels have been implemented properly. This is displayed in the top section:
No Disclosure Found Example:
One Disclosure Found Example:
If no TCPA disclosure label was found, stop here and review the implementation of TCPA labels to ensure they are correct.
Based on the Disclosure(s) that are identified, is the expected disclosure included? Be sure to properly label ALL of the disclosures on the site in the event that there are multiple.
If multiple disclosures are in use, review the multiple TCPA labels implementation to ensure that each disclosure is being captured as intended.
Step 6: Leverage the “Test TCPA Implementation” button
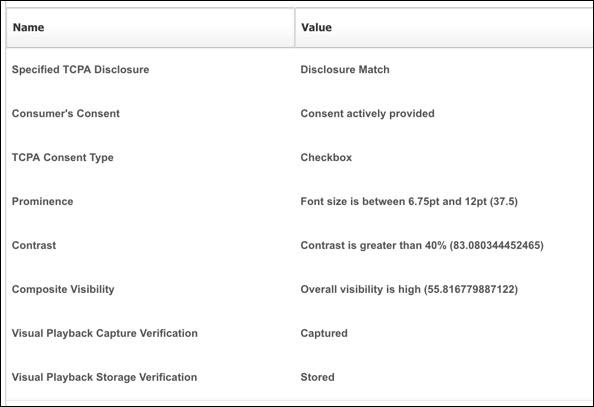
Utilizing this functionality will provide the results from the lead event relating to the disclosure language that is entered, including:
What kind of interaction was witnessed (checkbox, submit button, etc)?
What is the size of the text (Prominence)?
How does the color of the text compare to the color of the background (Contrast)?
Was the language actually seen by the Consumer (Visibility)?
The results of the test will elicit the default flag settings for the lead event Values (example below). This means they have no relation to the actual settings that a lead purchaser has in their own account settings. Therefore, you may ignore the colored flag results.
To initiate a TCPA Self Test follow these steps:
Click the orange “Test TCPA Implementation” button from the upper right corner of the LeadiD’s detail page.
Either place the language from your site or disclosure language you have received from a client into the text block.
Click the “Run Test” button next to the text block.
Review the results as noted below.

TCPA SELF-TEST EXAMPLE RESULT (colored flags removed)
What the TCPA Self Test Does Do
Appropriately responds with the Prominence, Contrast, and Visibility values of the matching language
Returns the LeadiD default flag settings for each response
What the TCPA Self Test Does NOT Do
Does not return the TCPA Response flags for a specific client’s settings
Cannot tell you if the language displayed on your page is a match to the language stored (and therefore approved) in a client’s profile.
Step 7: Complete Self Test Confirmation Survey
Finished? Great job! Please complete the survey at the link below to submit a request to our support team and confirm everything is correct.